Modbus TCP Simulator in 5 Minutes with SPX: Quickstart
- Aleksander Stanik

- Feb 5
- 3 min read
This is a hands-on quickstart. For a technical overview of register maps, scaling, endianness, scenarios, and automation workflows, see Modbus Simulator.

In this quickstart you’ll launch a realistic Modbus TCP device simulation in about five minutes using SPX. The flow is intentionally simple: download the SPX package, run the setup wizard, start the local stack, open the SPX UI, select a ready-made Modbus TCP instance, and verify it using a standard Modbus client tool. The result is a repeatable “virtual device lab” environment you can use for integration testing, demos, and regression baselines without a hardware lab.
Tip #1 - Install SPX and select Smart Building Pack
Get your Product Key + installer package
Log in and open Product & Keys: https://www.simplephysx.com/keys
Copy your SPX Product Key
Download the installer package (e.g. spx-examples-<version>.zip)
Extract the ZIP
Unzip the package into a dedicated folder (e.g. spx-examples-<version>/). You should see platform launchers like spx-setup.*.
Run the Setup Wizard (spx-setup.*)
From the extracted folder, start the launcher for your OS:
Windows: double-click spx-setup.bat
macOS: double-click spx-setup.command
Linux desktop: double-click spx-setup.desktop
Terminal (macOS/Linux): ./spx-setup.sh
In the wizard: select Industrial Pack + paste your key
Select Industrial Pack (ENTER accepts recommended defaults)

Paste your SPX Product Key when prompted

Review the summary and choose Start the stack now
Note: For the full, always up-to-date installation instructions (including prerequisites and OS-specific launchers), see the SPX Installation Guide in the docs: https://docs.simplephysx.com/getting-started/installation-guide.
Tip #2 - Open the SPX UI
Open: http://localhost:3000

You should see the SPX interface with a list of available instances from the Industrial Pack.
Tip #3 - Start the Modbus TCP simulator instance
From the list of available instances, select:
spx_s7_1500_process_cell
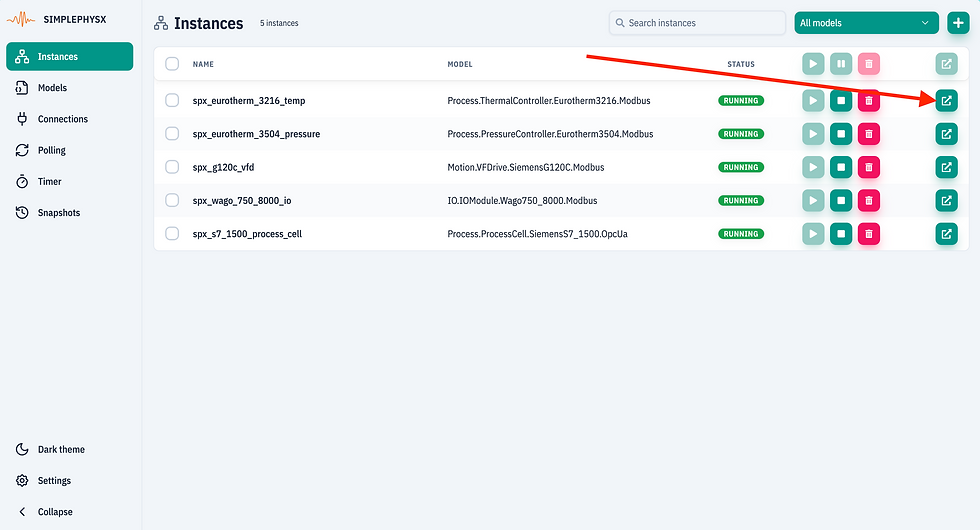
Open the instance and confirm:
Status: Running
Modbus TCP connection details (host/port)
A register/attribute view (values visible and updating if the model is dynamic)
Tip: If the model includes physics-driven behavior or scenarios, register values can evolve realistically over time.

Tip #4 - Verify it with a Modbus client
To validate the simulator is live, connect using any Modbus TCP client, for example:
• QModMaster (free, cross-platform)
• Modbus Poll (Windows)
• your gateway / SCADA / HMI software
Use the connection details from SPX instance view, typically:
Host: localhost
Port: [PORT from the SPX instance] (often 502, but use the value shown in SPX)

In your Modbus client:
Connect to the Modbus TCP server
Read a few registers (holding registers are a common starting point)
Confirm values are returned consistently
If the model supports it, write a value and observe the state change (optional)
Expected outcome (what “done” looks like)
You can read (and optionally write) registers reliably, confirming the simulator behaves like a real Modbus TCP device.
Next: customize and extend (coming next)
Next we’ll take this same instance and:
Tweak the model in the editor and reload it
Generate a new variant via an LLM workflow
Run scenario-driven tests and capture reproducible baselines


